Welcome to the GE Washer Troubleshooting Manual! This guide is designed to help you diagnose and resolve common issues with your GE washing machine. Whether you’re dealing with a washer that won’t start, excessive noise, or water leaks, this manual provides step-by-step solutions. Regular maintenance and understanding error codes can save you time and money. If DIY fixes aren’t enough, we’ll guide you on when to call a professional. Let’s get started and keep your washer running smoothly!
1.1 Understanding the Importance of Regular Maintenance
Regular maintenance is crucial for ensuring your GE washer operates efficiently and lasts longer. By following the guidelines in your user manual, you can prevent common issues before they arise. Simple tasks like cleaning the washer filter, checking hoses, and ensuring proper ventilation can significantly reduce the risk of malfunctions. Neglecting maintenance may lead to poor performance, increased energy consumption, or even costly repairs. Schedule routine checks to keep your washer in optimal condition and avoid unexpected breakdowns. Refer to your manual for specific maintenance recommendations tailored to your GE model. Consistent upkeep will enhance reliability and extend the lifespan of your appliance.
1.2 Overview of Common Issues in GE Washers
GE washers, like any appliance, can experience issues over time. Common problems include the washer not starting, failing to spin or drain, producing excessive noise, or leaking water. These issues often stem from clogged filters, faulty sensors, or worn-out parts. Understanding these common problems can help you identify symptoms early and take corrective action. This manual provides insights into diagnosing these issues and offers practical solutions. By addressing these problems promptly, you can extend the lifespan of your washer and maintain its performance. Familiarizing yourself with these common issues will empower you to troubleshoot effectively and keep your GE washer running smoothly for years to come.
Safety Precautions Before Troubleshooting
Ensure your safety before troubleshooting your GE washer. Always disconnect power and water supply, wear protective gear, and avoid flammable substances. Follow all safety guidelines to prevent accidents and ensure effective repairs.
2.1 Essential Safety Tips for Working on Your Washer
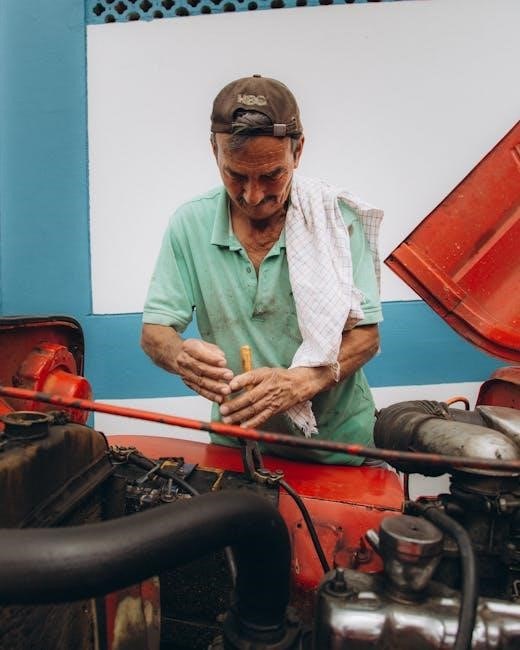
Before troubleshooting your GE washer, always prioritize safety. Disconnect the power supply and water hoses to avoid electrical shocks or water damage. Wear protective gloves and eyewear to prevent injuries. Never attempt repairs near open flames or sparks, as flammable substances like gasoline residue on clothes can ignite. Ensure the washer is completely stopped and cooled down before accessing internal components. Follow all instructions in the user manual and avoid bypassing safety features. If unsure about a procedure, consult a professional technician. Remember, safety should always come first to prevent accidents and ensure effective repairs.
2.2 Disconnecting Power and Water Supply
Before working on your GE washer, always disconnect the power cord from the electrical outlet to prevent shocks or injuries. Turn off the water supply valves located behind the washer or on the wall to avoid water leakage. Carefully unplug the power cord and allow the washer to cool down if it was recently in use. Drain the water hoses by placing the ends in a bucket or sink. Never attempt repairs while the washer is connected to power or water. Refer to your user manual for specific instructions on locating and shutting off these supplies. This step ensures a safe working environment for troubleshooting or repairs.

Common GE Washer Issues and Solutions
Addressing common issues like a washer not starting, poor spinning, or excessive noise can often be resolved with simple fixes. Check power connections, error codes, and blockages. Regular maintenance, like cleaning filters and ensuring proper loading, helps prevent these problems. Refer to your manual for specific solutions tailored to your GE washer model, ensuring optimal performance and extending its lifespan. Troubleshooting guides and diagnostic modes are valuable tools for identifying and resolving issues efficiently. Always prioritize safety when addressing any washer malfunction to avoid further damage or injury.
3.1 Washer Will Not Start
If your GE washer won’t start, begin by checking the power supply. Ensure the washer is properly plugged in and that the circuit breaker hasn’t tripped. Verify that the child lock feature is not activated, as this can prevent the washer from starting. Check the door latch to ensure it is closed tightly, as an open lid can prevent operation. Review the display for any error codes, which can indicate specific issues. Consult the troubleshooting section of your user manual for guidance on resolving these codes. If the problem persists, contact a professional for further assistance to avoid potential damage or safety hazards.
3.2 Washer Not Spinning or Draining
If your GE washer isn’t spinning or draining, start by checking the drain hose for kinks or blockages. Ensure the washer filter is clean, as debris can prevent proper drainage. Verify that the power supply is stable and the washer is properly balanced. If the issue persists, check for error codes in the display, which can indicate specific problems like a faulty drain pump or sensor. Consult the user manual for code meanings and follow the recommended troubleshooting steps. If the problem remains unresolved, contact a professional to avoid further damage or safety risks. Regular maintenance can help prevent such issues in the future.
3.3 Excessive Noise or Vibration
If your GE washer is making excessive noise or vibrating excessively, check for unbalanced loads or uneven installation. Ensure the washer is level and the floor is stable. Blockages in the drain hose or pump filter can also cause noise. Verify the drain hose isn’t kinked or clogged. If the issue persists, inspect the tub bearings or shocks for wear. Check the belt and motor for loose connections. Refer to the user manual for diagnostic modes to identify specific fault codes. If noises are accompanied by error codes, address them according to the manual’s instructions. Regular maintenance, like cleaning the filter and ensuring proper load distribution, can prevent such issues. If unresolved, contact a professional.
3.4 Leaks or Water Damage
If your GE washer is leaking or causing water damage, start by checking the detergent drawer for overfilling or clogs. Inspect the drain hose for kinks, blockages, or loose connections. Verify the pump filter is clean, as debris can cause leaks. Check the door seal for damage or mold buildup. Ensure all hoses are securely attached and not cracked. If water damage occurs, turn off the washer immediately and unplug it. Refer to the troubleshooting guide in your user manual for specific error codes related to water issues. Regularly cleaning the detergent drawer and ensuring proper installation can prevent future leaks. If the issue persists, contact a professional to avoid further damage.

Error Codes and Their Meanings
GE washer error codes help identify specific issues, such as faulty sensors or drainage problems. Refer to your user manual to decode and resolve these codes effectively.
4.1 Decoding GE Washer Error Codes
Decoding GE washer error codes is crucial for diagnosing issues accurately. Error codes like “E2” indicate specific problems, such as a faulty water temperature sensor. Always refer to the user manual or GE Appliances’ official website for a comprehensive list of error codes and their meanings. If the code isn’t listed, online forums or customer support can provide additional insights. Addressing error codes promptly helps prevent further damage and ensures your washer operates efficiently. Regularly checking and understanding these codes can save time and money in the long run.
How to Use the GE Washer User Manual
Explore the GE Washer User Manual for troubleshooting guides, maintenance tips, and error code explanations. Visit the GE Appliances website, enter your model number, and access detailed instructions for optimal performance and repair.
5.1 Navigating the Troubleshooting Section
The troubleshooting section of your GE Washer User Manual is a valuable resource for identifying and resolving issues. Start by locating the section, often found toward the end of the manual or online. It’s organized by common symptoms, such as “washer won’t start” or “excessive noise.” Each issue lists possible causes and step-by-step solutions. Use error codes to quickly pinpoint problems, as they often correspond to specific malfunctions. Follow the instructions carefully, and if a fix requires advanced skills, consider consulting a professional. Regularly reviewing this section can help you address minor issues before they escalate, ensuring your washer runs efficiently for years to come.
Advanced Troubleshooting Techniques
Explore advanced methods to diagnose and repair your GE washer. Access diagnostic mode for detailed error analysis, enabling precise issue identification and resolution. Always follow safety guidelines and manufacturer instructions to avoid further damage or risk. If problems persist, consult a professional for specialized assistance. This approach ensures efficient and effective troubleshooting for complex issues.
6.1 Activating Diagnostic Mode
Activating diagnostic mode on your GE washer allows for advanced troubleshooting by accessing detailed error codes and system checks. To enter diagnostic mode, press and hold the “Start/Stop” and “Soil Level” buttons simultaneously for 5 seconds. The display will flash, indicating the diagnostic mode is active. Use the dial to navigate through various tests, such as motor, pump, and valve function. This feature helps identify issues quickly and accurately. Always refer to your user manual for specific instructions, as procedures may vary by model. Remember to disconnect power before performing any internal repairs for safety. This mode is a powerful tool for DIY enthusiasts and professionals alike.
Maintenance Tips to Prevent Future Issues
Regularly cleaning the washer filter, checking and replacing hoses, and ensuring proper balancing can prevent many future issues. Schedule maintenance to keep your GE washer running efficiently.
7.1 Cleaning the Washer Filter
Cleaning the washer filter is a simple yet crucial maintenance task to ensure optimal performance. Locate the filter, usually found at the bottom or back of the washer. Turn off the power and water supply before starting. Remove the filter and rinse it thoroughly with warm water to eliminate debris and lint. Check for blockages in the drain pump and hoses, as these can cause drainage issues. Regular cleaning prevents mold buildup and ensures proper water flow. Replace the filter securely after cleaning. Perform this task every 1-2 months or as specified in your GE washer manual to maintain efficiency and prevent future problems.
- Clean the filter every 1-2 months.
- Check for blockages in the drain pump.
- Ensure proper water flow after reinstallation.
7.2 Checking and Replacing Hoses
Regularly inspecting and replacing hoses is essential for maintaining your GE washer’s performance. Start by checking the inlet and drain hoses for signs of wear, cracks, or kinking. If you notice any damage, replace the hoses immediately to prevent leaks or water damage. Ensure all connections are secure and not loose. Replace hoses every 5-7 years or as recommended by the manufacturer. Use genuine GE parts for compatibility and reliability. Properly align the hoses to avoid kinking, which can restrict water flow. If you suspect a blockage, clean or replace the hose to restore normal function. Regular hose maintenance prevents costly repairs and ensures efficient operation.
- Inspect hoses every 6 months for damage.
- Replace damaged or worn-out hoses promptly.
- Use genuine GE parts for optimal performance.
- Ensure all connections are secure and properly aligned.
When to Call a Professional
If issues persist after DIY troubleshooting or involve complex repairs, contact a certified GE technician. Persistent error codes, severe damage, or safety risks require professional expertise to ensure proper resolution and safety.
8.1 Identifying Issues Beyond DIY Repair
Sometimes, issues with your GE washer may require professional attention. If you encounter persistent error codes, severe mechanical damage, or complex electrical problems, it’s best to call a technician. DIY repairs can be risky if you’re dealing with high-voltage components, gas lines, or critical safety systems. Additionally, if the washer’s control board, motor, or pump is faulty, specialized tools and expertise are needed. Always consult a certified GE technician for warranty-related repairs to avoid voiding coverage. If you’re unsure about the severity of the issue or feel unsafe attempting a repair, professional service is the safest and most reliable option.
Successfully troubleshoot and maintain your GE washer with the steps provided. For complex issues, seek professional help to ensure efficient operation and prolong its lifespan.
9.1 Summarizing Key Troubleshooting Steps
Troubleshooting your GE washer effectively involves identifying symptoms, checking power and water supply, and consulting error codes. Start by ensuring the washer is properly plugged in and the outlet works. Check for blockages in hoses and drains, as these often cause drainage issues. For error codes, refer to your user manual or GE’s official resources. Regular maintenance, like cleaning filters and inspecting hoses, prevents many problems. If issues persist, diagnostic mode can provide deeper insights. Always prioritize safety by disconnecting power before attempting repairs. If unsure, contact a professional to avoid further damage. By following these steps, you can resolve most issues efficiently.