Beckett Oil Burner Troubleshooting Manual: A Comprehensive Guide

Navigating oil burner issues demands a systematic approach, especially with Beckett models, focusing on power, ignition, and consistent operation for optimal heating performance.
Understanding Beckett Oil Burners
Beckett oil burners are renowned for their reliability and efficiency in residential heating systems, but even the best equipment requires occasional troubleshooting. These burners utilize a specific sequence for ignition and operation, making understanding their core components crucial for effective diagnosis. The system relies on a precise fuel-air mixture, ignited by a spark, and maintained by a flame sensor – typically a photocell.
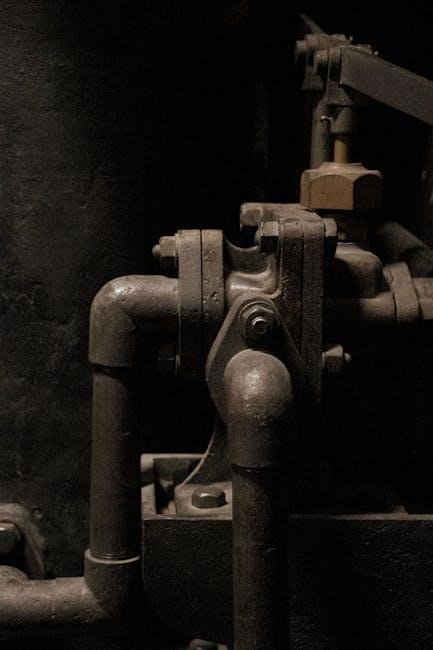
Key components include the fuel pump, nozzle, air shutter, and the control unit which manages the ignition sequence and safety features. The Genisys series, like the 7505 model, incorporates advanced features for optimized performance. Proper operation hinges on adequate fuel supply, correct air settings, and a stable electrical connection; Recognizing the interplay between these elements is fundamental to pinpointing the source of any malfunction. Ignoring proper maintenance can lead to issues like burner cycling or flame failure, necessitating a methodical troubleshooting process.
Common Beckett Burner Problems
Beckett oil burners, while durable, exhibit recurring issues that homeowners and technicians frequently encounter. A prevalent problem is intermittent flame failure, often manifesting as the burner firing briefly on reset before shutting down – sometimes consistently after 45 seconds, as reported in online forums. This can stem from a faulty photocell, inadequate fuel supply, or improper draft conditions within the flue and combustion chamber.
Other common concerns include no power reaching the burner, frequently linked to electrical connection problems or a malfunctioning control unit. Issues with nozzle size or air adjustment can lead to inefficient combustion, soot buildup, and reduced heating output. Furthermore, low firing rate scenarios may necessitate the installation of a baffle to ensure stable operation. Addressing these problems requires a systematic approach, starting with basic checks like fuel levels and electrical connections, before delving into more complex diagnostics.

Troubleshooting No Power Issues
Initial checks involve verifying the power supply and scrutinizing the R terminal for voltage, alongside a thorough inspection of all electrical connections and wiring;
Checking the R Terminal
The R terminal is crucial for Beckett burner operation, receiving 24 volts when the thermostat calls for heat. A lack of voltage here immediately signals an electrical problem upstream. Begin by carefully disconnecting the wire at the R terminal and using a multimeter to verify the presence of 24 volts AC when the thermostat demands heat – ensure the thermostat is set above the current room temperature.
If no voltage is present, trace the wiring back to the thermostat, checking for loose connections, corroded terminals, or damaged wiring along the path. A faulty thermostat is a common culprit, so consider temporarily bypassing it (with extreme caution and only for testing purposes!) to see if power reaches the R terminal. If voltage is present at the R terminal, but the burner still isn’t responding, the issue likely lies within the burner itself, or potentially with the control module.
Remember safety first: always disconnect power before working with electrical components!
Electrical Connections and Wiring
Thoroughly inspect all electrical connections associated with the Beckett burner system. Loose or corroded connections are frequent causes of intermittent operation or complete failure. Pay close attention to wire nuts, spade connectors, and terminal screws, ensuring they are tight and free from oxidation. Examine the wiring itself for any signs of damage, such as frayed insulation or cracked wires – replace damaged wiring immediately.
Verify the correct wiring configuration according to the burner’s wiring diagram. Incorrect wiring can lead to a variety of problems, including a lack of power to the burner or improper operation of safety devices. Check the grounding connection to ensure it is secure and effective. A poor ground can cause erratic behavior and increase the risk of electrical shock.
Always disconnect power before inspecting or working on electrical components, and use appropriate safety precautions.

Addressing Burner Not Staying Lit
Consistent flame retention hinges on a functional photocell, adequate fuel delivery, and proper draft conditions; intermittent cycling suggests underlying issues needing prompt diagnosis.
Photocell Issues and Testing
The photocell is crucial for maintaining a stable flame, acting as the burner’s ‘eye’ to confirm ignition and signal the oil supply to continue. When a Beckett burner fires briefly on reset but shuts down, the photocell is a prime suspect. Testing involves visually inspecting the photocell for dirt or oil accumulation – cleaning with a soft cloth is often the first step.
More rigorous testing requires a multimeter. With the burner operating (briefly, if necessary), measure the photocell’s current output. A reading below the manufacturer’s specification (typically a few microamps) indicates a faulty photocell. Ensure proper alignment with the flame; even slight misalignment can prevent reliable flame detection. Consider that a failing photocell can intermittently work, making diagnosis tricky. Replacement is often the most effective solution, ensuring a consistent and safe operation of the oil burner system. Always disconnect power before handling electrical components.
Reset Button Cycling – Identifying the Root Cause
Frequent cycling of the reset button signals an underlying problem, not a solution in itself. If the burner fires for a consistent, short duration after each reset – approximately 45 seconds, as reported – it points towards a recurring flame failure. This isn’t simply a matter of repeatedly ‘jump-starting’ the burner; it’s a symptom demanding investigation.
The root cause could stem from several areas. Insufficient fuel supply, a dirty or malfunctioning photocell, inadequate flue or chamber draft, or incorrect nozzle/air settings are all potential culprits. A low firing rate baffle might be necessary if the burner is oversized for the heating demand. Systematically checking each of these components is vital. Ignoring the cycling reset button risks further damage and potential safety hazards. Prioritize a thorough diagnostic approach rather than relying on temporary resets.
Fuel Supply Problems
Consistent flame failure, particularly after a brief run time, often indicates fuel delivery issues. Begin by verifying an adequate oil supply in the tank – a seemingly obvious, yet frequently overlooked step; Next, inspect the fuel filter for blockage; a clogged filter restricts fuel flow, leading to burner shutdown; Examine the fuel line for kinks, leaks, or sediment buildup, all of which can disrupt the fuel’s journey to the burner.
The fuel pump itself is a critical component. Ensure it’s functioning correctly and delivering fuel at the proper pressure. Air in the fuel line can also cause intermittent flame failure. Bleeding the fuel line can resolve this. Remember, a properly functioning fuel supply is paramount for stable combustion. Addressing these potential fuel-related issues is a crucial step in troubleshooting a Beckett burner.

Diagnosing Flame Failure
Flame failure requires a methodical check of fuel, draft, and burner settings, ensuring proper combustion and safe operation for consistent heating performance.
Correcting Fuel Supply Issues
Addressing fuel supply problems is paramount when diagnosing flame failure in a Beckett oil burner. Begin by verifying an adequate oil supply in the tank; a near-empty tank can introduce air into the system. Inspect the fuel filter for clogs – a restricted filter significantly reduces oil flow, leading to inconsistent combustion.
Next, examine the fuel line for kinks, bends, or leaks that could impede oil delivery. Ensure the oil pump is functioning correctly; listen for consistent operation during the burner’s start-up cycle. A failing pump may not generate sufficient pressure. Check the oil strainer before the pump for debris accumulation.
Furthermore, confirm the nozzle isn’t clogged or damaged, as this directly impacts fuel atomization. A properly sized and clean nozzle is crucial for stable flame. Finally, air in the fuel line is a common culprit; bleeding the line can resolve intermittent flame issues. Remember to consult the manufacturer’s specifications for proper fuel pressure and flow rates.
Ensuring Proper Flue Draft
Maintaining adequate flue draft is critical for safe and efficient Beckett oil burner operation. Insufficient draft leads to combustion byproducts entering the living space, posing a safety hazard and causing burner malfunction. Begin by visually inspecting the flue pipe for obstructions like bird nests, debris, or collapsed sections. Any blockage restricts airflow and reduces draft.
Verify the flue pipe is properly sized for the burner and rises vertically for a sufficient distance to establish a natural draft. A chimney height that’s too short can compromise draft. Check for air leaks in the flue pipe connections; these leaks disrupt the draft pattern.
External factors like wind direction and nearby structures can also affect draft. Consider a chimney cap to prevent downdrafts. A draft gauge can accurately measure flue draft; consult the burner’s specifications for the recommended draft range. Correcting draft issues is essential for reliable ignition and stable flame.
Verifying Chamber Draft
Proper chamber draft is as vital as flue draft for optimal Beckett burner performance and safety. The combustion chamber needs sufficient airflow to support complete fuel combustion and prevent the buildup of hazardous gases. Begin by ensuring the burner is properly sealed to the combustion chamber, preventing air infiltration from unintended sources.
Inspect the chamber for obstructions, such as soot accumulation or debris, which can restrict airflow. A visual check can reveal potential issues; Carefully examine the chamber door or access panel for a tight seal; gaps can disrupt draft patterns.
A draft gauge, similar to the one used for flue draft, can measure chamber draft. Refer to the burner’s manual for the specified draft range. Low chamber draft can cause flame instability and burner cycling. Correcting chamber draft issues often involves sealing leaks, cleaning the chamber, and ensuring proper burner installation.

Nozzle and Air Settings Optimization
Achieving efficient combustion requires precise nozzle selection and air adjustment, ensuring a clean burn and maximizing heating efficiency for your Beckett oil burner.
Nozzle Size and Type Considerations
Selecting the correct nozzle is paramount for optimal burner performance. The nozzle size, measured in gallons per hour (GPH), directly impacts heat output and efficiency. A nozzle that’s too large will produce excessive soot and potentially flame instability, while one that’s too small will result in a weak flame and reduced heating capacity.
Consider the burner’s BTU input rating and the heating requirements of the space when choosing a nozzle. Different nozzle types, such as solid cone, hollow cone, and spray angle variations, are suited for various burner models and combustion chamber designs. Refer to the Residential Oil Specification Guide for recommended start-up settings.
Always use a nozzle specifically designed for oil burners and ensure it’s compatible with your Beckett model. Inspect the nozzle regularly for wear, clogs, or damage, as these can significantly affect spray pattern and combustion quality. Replacing a worn nozzle is a cost-effective way to restore burner efficiency and reduce emissions.
Air Adjustment Procedures
Proper air adjustment is crucial for achieving clean, efficient combustion. The air shutter controls the amount of air mixed with the fuel, influencing flame characteristics. Insufficient air leads to a smoky, yellow flame and carbon buildup, while excessive air results in a noisy, unstable flame and reduced heat transfer.
Begin by observing the flame color and pattern. A properly adjusted flame should be bright blue with a well-defined inner cone. Slowly adjust the air shutter, making small increments, and observe the flame’s response.

Refer to the manufacturer’s specifications for the recommended air settings for your specific burner model and nozzle size. Use an oil draft gauge to measure flue gas oxygen levels, aiming for the optimal range specified in the Residential Oil Specification Guide. Fine-tune the air shutter until the flame is stable, clean-burning, and produces minimal smoke or noise. Regular adjustments may be needed as the burner ages or operating conditions change.

Low Firing Rate Baffle Requirements
Burner baffles stabilize low-fire operation, preventing flame rollout and ensuring efficient combustion when the heating demand is reduced significantly.
Identifying When a Baffle is Needed
Determining if a low firing rate baffle is necessary involves considering the burner’s capabilities and the heating system’s requirements. A baffle becomes crucial when the burner operates at significantly reduced firing rates, often encountered with modern, high-efficiency heating systems or during milder weather conditions.
Specifically, if the burner cycles on and off frequently due to short firing runs, a baffle can help maintain stable combustion. Flame rollout, characterized by flames extending beyond the burner head, is a clear indicator that a baffle is needed.
Consulting the Residential Oil Specification Guide is paramount; it provides start-up settings and clarifies if a baffle is required for the specific burner and boiler combination. Pay attention to the burner’s maximum and minimum firing rates, comparing them to the boiler’s demands. If the minimum firing rate is too high for the boiler, a baffle is likely essential for efficient and safe operation.
Baffle Installation and Adjustment
Installing a low firing rate baffle requires careful attention to detail to ensure proper functionality and safety. Begin by disconnecting power to the burner and following the manufacturer’s instructions specific to your Beckett model. The baffle typically mounts within the burner’s air chamber, redirecting airflow to stabilize the flame at lower firing rates.
Once installed, adjustment is critical. Start with the baffle in its default position and observe the burner’s operation. Fine-tune the baffle’s angle or position, if adjustable, to achieve a stable, clean flame without rollout. Monitor the flue draft and chamber draft to confirm adequate ventilation.
Proper adjustment minimizes noise and ensures complete combustion, maximizing efficiency and reducing carbon buildup. Regularly inspect the baffle for damage or soot accumulation, cleaning or replacing it as needed to maintain optimal performance. Always re-verify settings after any maintenance.

General Maintenance and Cleaning
Routine inspections and meticulous cleaning of key components are vital for sustained Beckett burner efficiency, preventing issues and ensuring reliable heating throughout the season.
Regular Burner Inspections
Consistent, scheduled inspections are the cornerstone of preventative maintenance for your Beckett oil burner. These checks should ideally occur annually, preferably before the heating season begins, and can significantly reduce the likelihood of unexpected breakdowns during colder months. Begin by visually examining all fuel lines for any signs of leaks, cracks, or deterioration. Pay close attention to connections and fittings, ensuring they are tight and secure.
Next, inspect the burner head itself. Look for carbon buildup, corrosion, or any physical damage. A dirty burner head can lead to inefficient combustion and increased soot production. Carefully check the photocell lens for cleanliness; a dirty lens can prevent proper flame detection, causing the burner to shut down prematurely. Don’t forget to examine the ignition transformer for any signs of wear or damage. Finally, verify the integrity of the flue pipe, ensuring it’s properly connected and free from obstructions. Documenting these inspections will help track the burner’s condition over time and identify potential problems early on.

Cleaning Procedures for Key Components
Thorough cleaning is vital for maintaining optimal Beckett burner performance. Begin with the burner head; carefully remove it and use a soft brush and solvent specifically designed for oil burners to eliminate carbon deposits. Avoid abrasive cleaners that could damage the delicate components. The photocell lens requires gentle cleaning with a soft cloth and appropriate cleaning solution – never use water! Inspect and clean the nozzle, replacing it annually or as needed to ensure proper fuel atomization.
The combustion chamber should be vacuumed to remove soot and debris, improving airflow and combustion efficiency. Carefully clean the ignition transformer terminals to ensure a strong spark. Finally, inspect and clean the fuel filter, replacing it if necessary to prevent contaminants from reaching the burner. Always disconnect power before performing any cleaning procedures and ensure all components are completely dry before reassembly. Proper cleaning extends the life of your burner and ensures safe, efficient operation.